


Japanese Harajuku Makeup (Zipper Inspired)
minna-san konnichiha (konnichiwa)! that's about as much japanese i can speak, but i can't help it because wearing such a japanese look make me wanna speak some japanese (even if mine is really bad).
if you don't know what is Zipper, here's a front page of the magazine that focuses on harajuku fashion that targets young teenage girls, which sort of explains the loud colours and style.
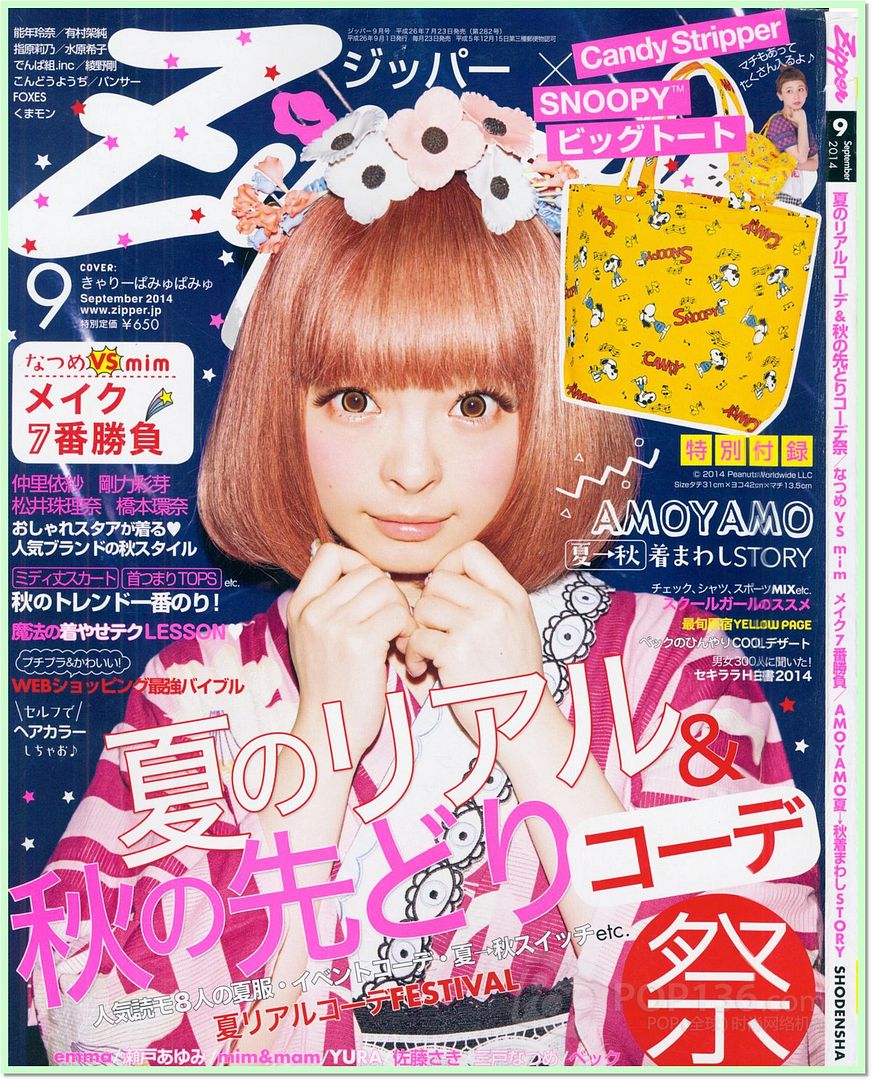
there're many different models in the magazine, the more well known one is probably amo (i've done an inspired look meant for daily wear before). this time, i am more interested in another model by the name of ayumi as her vibrant and colourful makeup is something i find really interesting.
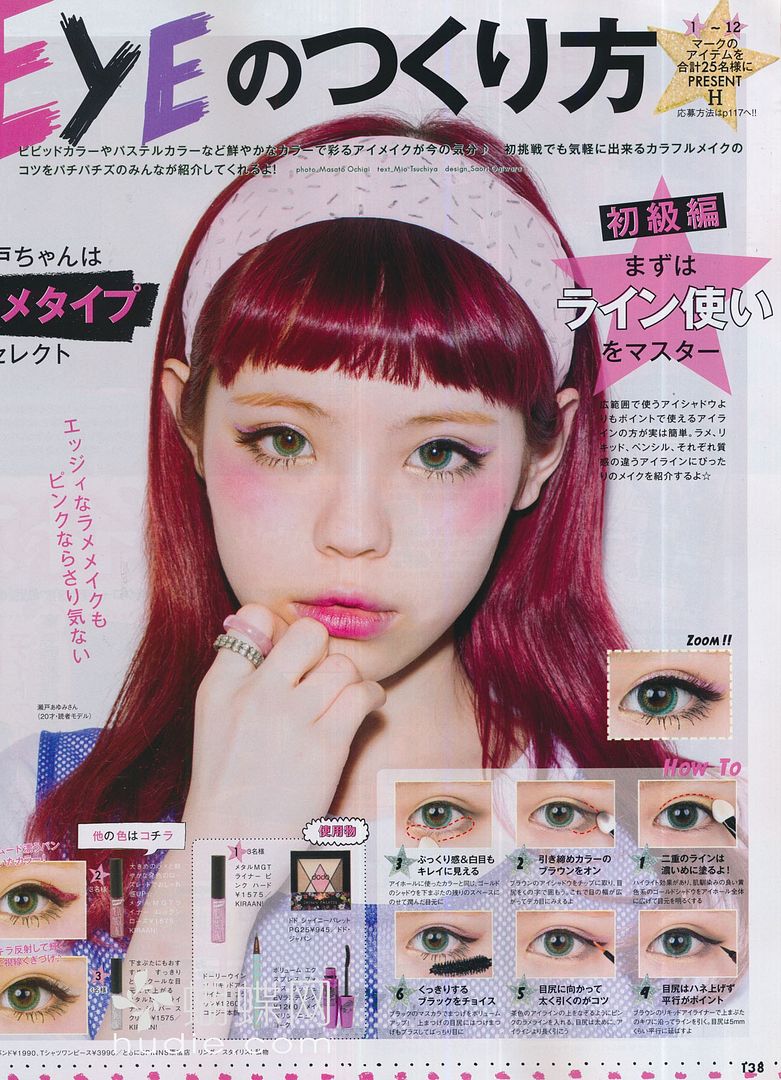
inspiration for the look i did!
the main points of the look are:
1. very fair skin
2. light coloured eyebrow
3. vibrant/pastel/light colours on the eyes and winged kitty eyes
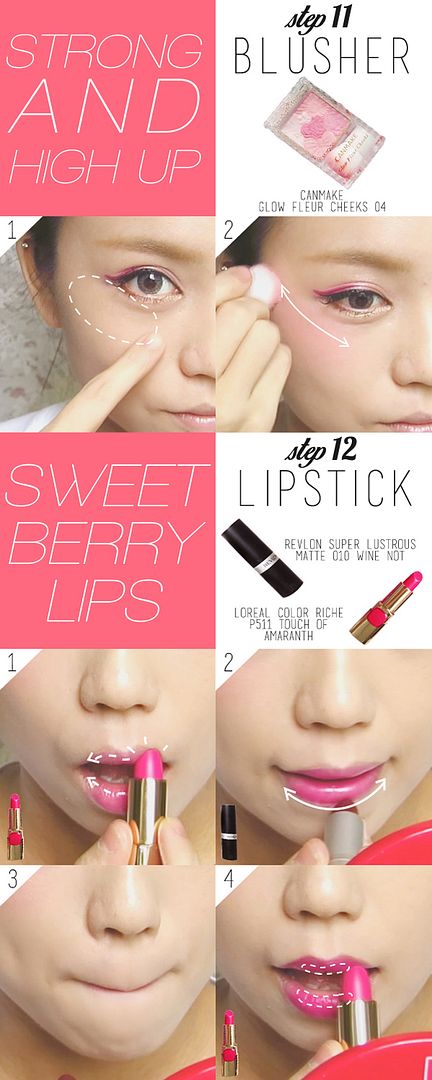
4. blusher is applied above cheek bone and below eyes
5. berry toned lips (the only thing that's slightly darker on the entire face)
watch the video tutorial here!
PRODUCTS USED____________________________________________________________
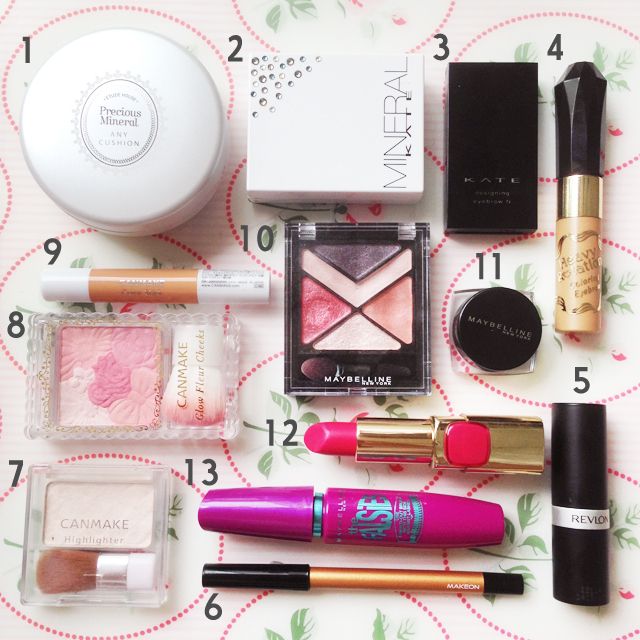
from left to right, clockwise:
1. etude house precious mineral any cushion W13
2. kate mineral powder foundation OC-B
3. kate designing eyebrow N EX-4
4. heavy rotation coloring eyebrow 03
5. revlon super lustrous matte lipstick 010 wine not
6. makeon super long lasting waterproof gel pencil liner S05 gold
7. canmake highlighter 05
8. canmake glow fleur cheeks 04
9. canmake color stick 09
10. maybelline hyper diamond shadow PK-1
11. maybelline eye studio lasting drama gel liner BLACK
12. loreal color riche lipstick P511 touch of amaranth
13. maybelline the falsies mascara BLACK
BRUSHES USED:
1. elf studio complexion brush
2. kate eyeliner brush (cut into an angled brush for eyebrow)
3. maybelline eyeliner brush
4. generic flat top eyeshadow brush
PICTORIAL_________________________________________________________________
simple pictorial to supplement the video! i've marked out all the different areas for different products!
FACE:
if you are just like me with slightly darker and yellower skin, you'd want to apply the foundation over the entire face generously. making sure to brighten the area under the eyes especially. conceal any dark circles and set with a powder after that.
marshmellow skin is referring to the soft and smooth skin of a marshmellow, japanese dig that!!! to prevent caking, it's best to apply the powder with a large fluffy brush.
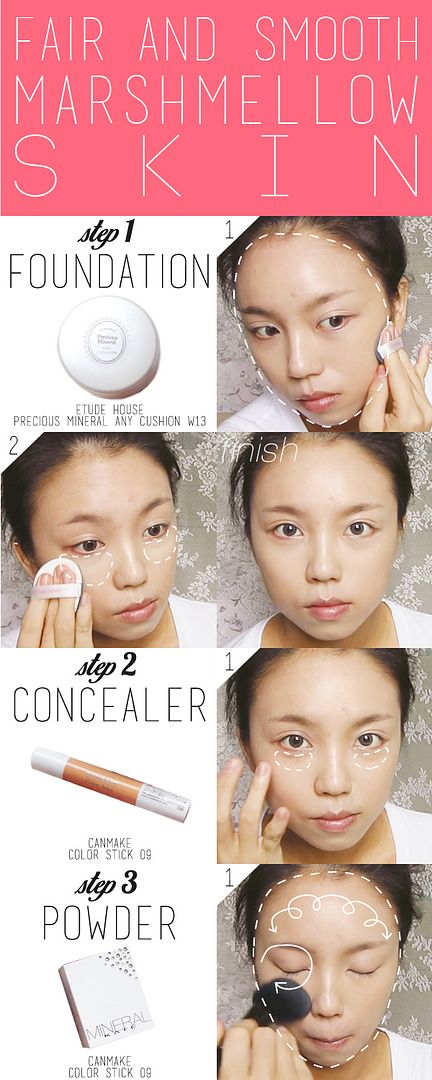
click on image to enlarge!
EYEBROWS:
i think japanese brow products tend to be on the yellowish side because people usually dye their hair towards that side of the colour spectrum. so much so that yellowish and light coloured eyebrow soon became the "japanese eyebrow". of course, it has got to be slightly angled upwards too! arch is optional.
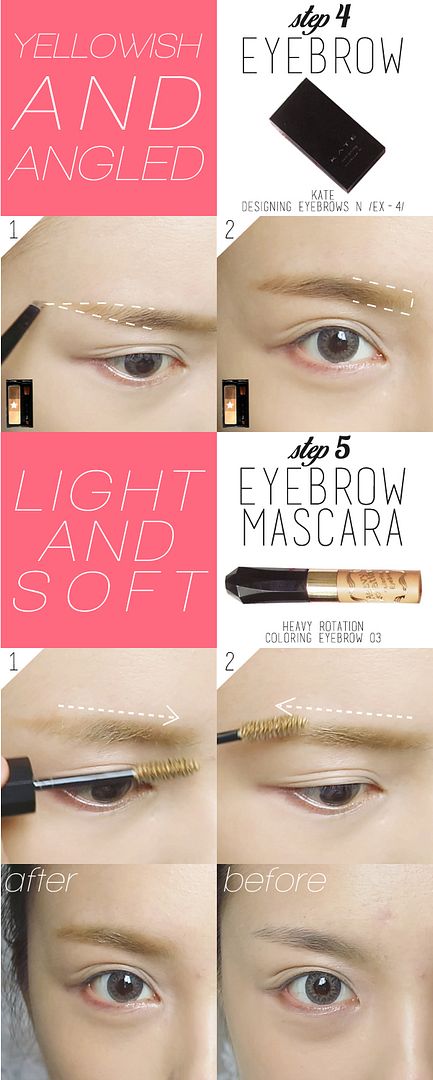
click on image to enlarge!
EYES:
this time's instruction for the eyes seems a little more complicated than usual because i keep going back and forth with the eyeshadow. you save the eyeliner for the last step if you know exactly where to put the pink colour. i only did my eyeliner first because it gives me a guide for filling in the pink later on.
do keep all of the colours WITHIN your eyelid folds so that when you open your eyes, the lid area above your folds are clean.
try your best to give yourself a really elongated wing that's pretty steep because it helps to give you kitty eyes (which is another point of this look).
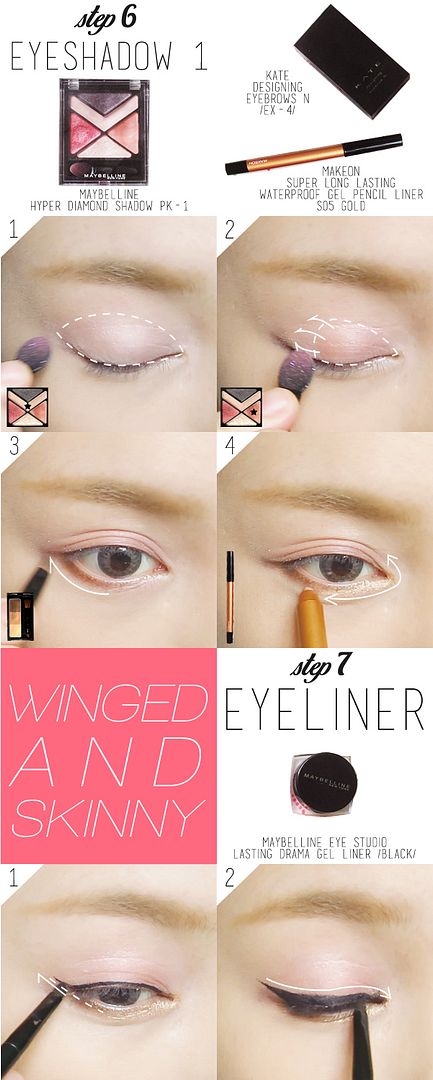
click on image to enlarge!
if you have a pink eyeliner that's long lasting and waterproof, you can skip part 2 of step 8 as it's mean to set the lipstick. fill in the pink lipstick on the entire width of your eyelid fold, do not go beyond that.
false lashes are optional, but if you like to, choose those that are longer on the outside to enhance that kitty look. remember to curl your lashes first!

click on image to enlarge!
apply mascara on parts of the lashes that aren't covered by the falsies. load up on the lower lashes too! looking at the photo, i should have went for another 3 coats.
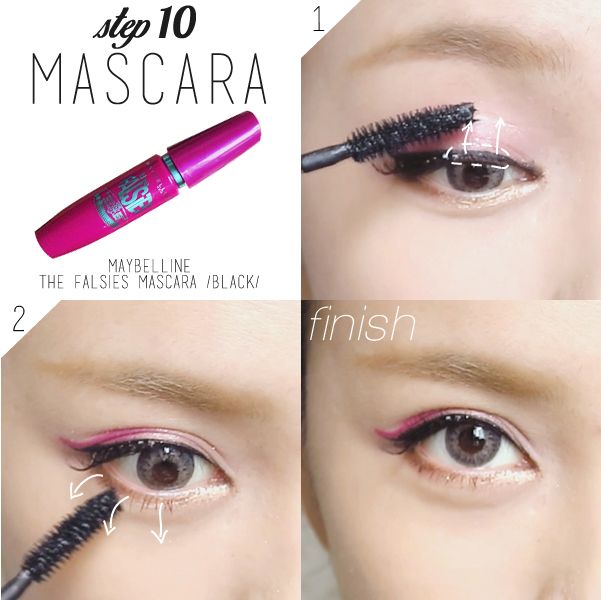
click on image to enlarge!
CHEEKS AND LIPS:
probably the most distinctive part of the zipper harajuku makeup: the placement of the blusher. it's between the highest point of your cheek bone and the lower lash line. you can choose to work from below the eyes and slowly bring it down, or do it like me - starting from the cheek bones, bring it up. it doesn't really matter since we'll make sure that the entire area will be just as pigmented in colour. smoothen out any edges and boundaries.
i used 2 lipsticks for my lips to create the berry shade as i don't have such a lipstick yet. if you already have one, just use it!
click on image to enlarge!
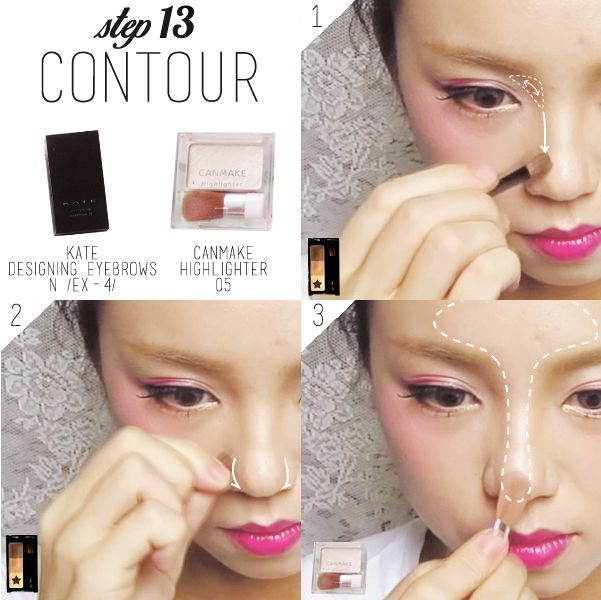
CONTOURING:
this isn't a main point of the makeup, but it's essential as we have lightened up our face (which takes away the natural contours). focus on the nose bridge, especially the triangular area between the eyebrow and nose bridge. you can ignore the rest of the contouring (especially if you're used to the western style) because this look IS MADE FOR PEOPLE WITH CHUBBY FACE LIKE ME. round is good :D
i had to sharpen the tip of my nose a little because most japanese have a skinny nose bridge!
click on image to enlarge!
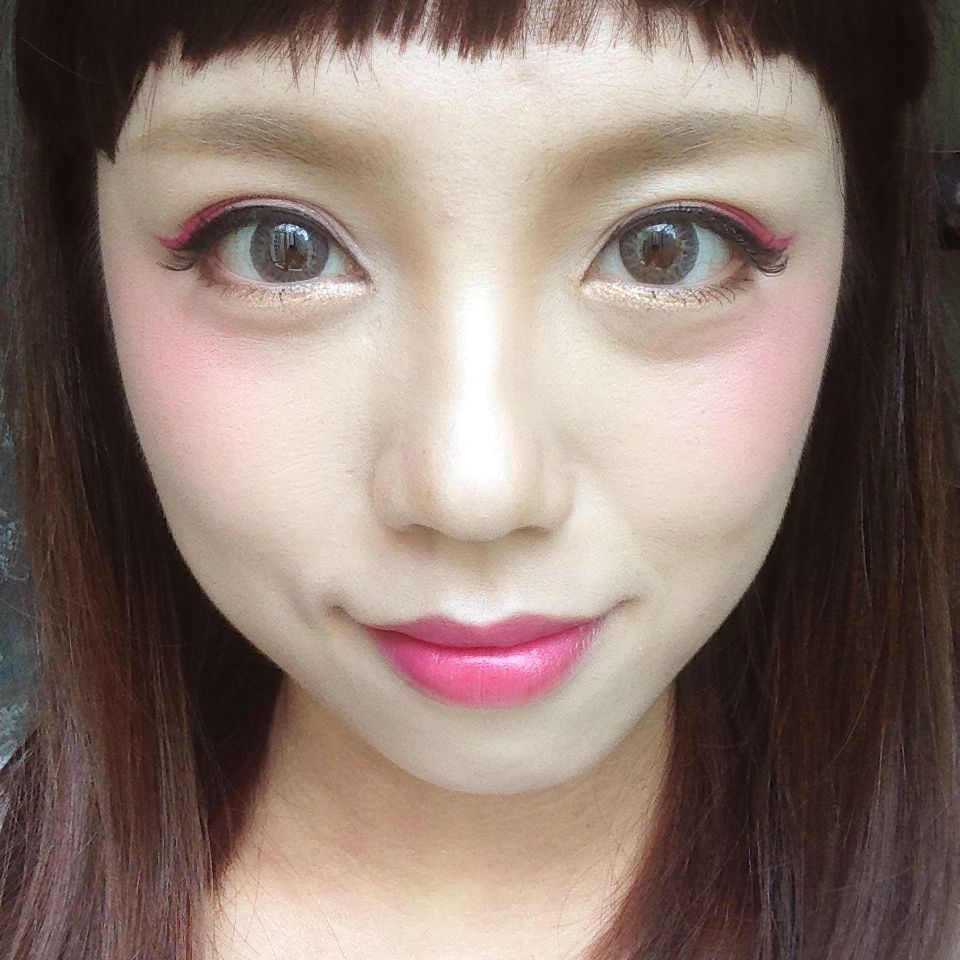
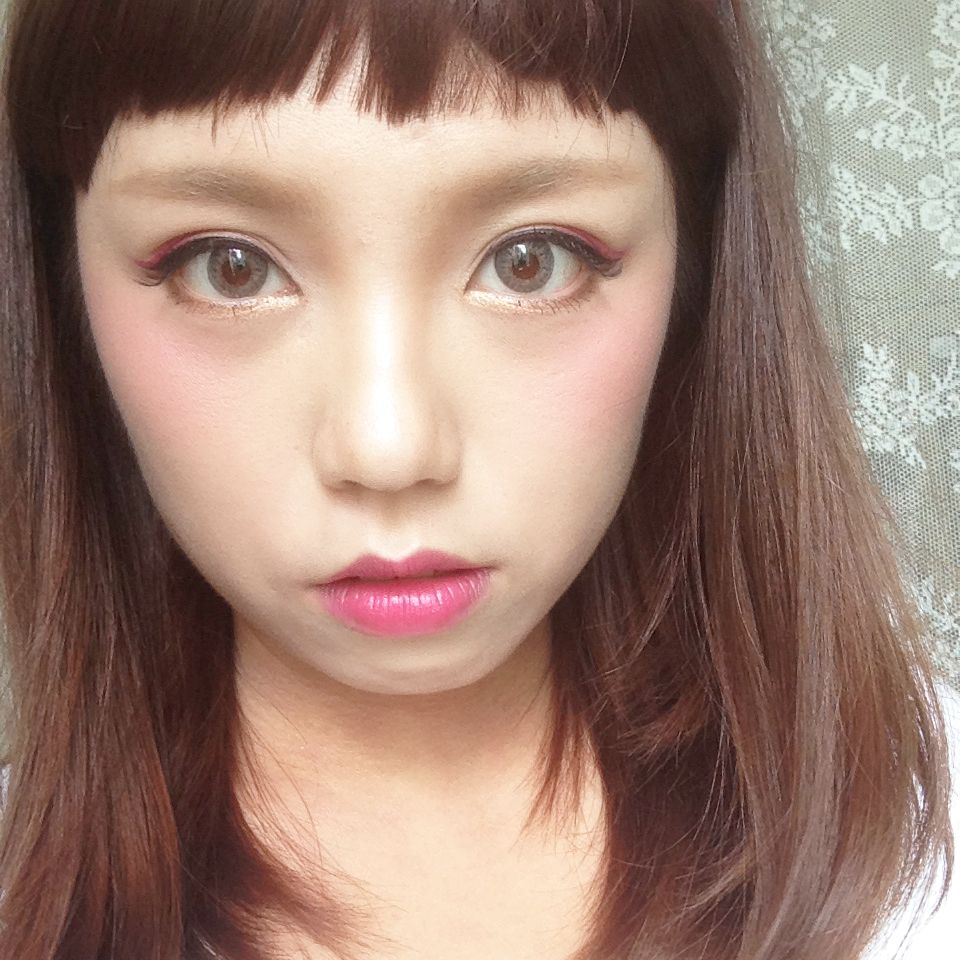
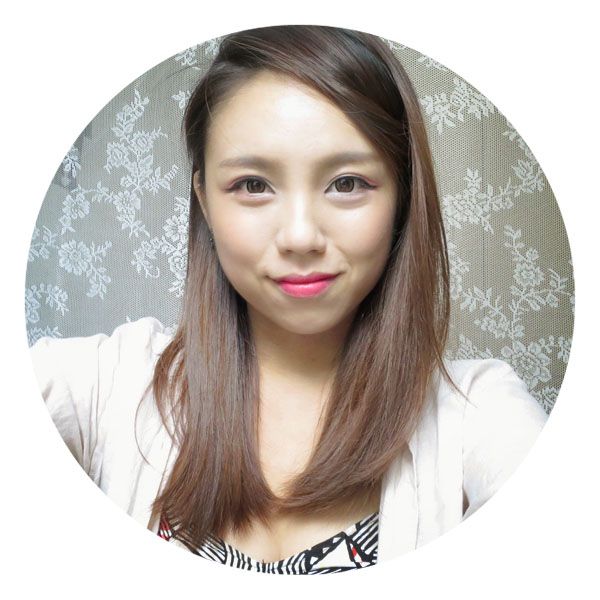
FINISHED LOOK____________________________________________________________
i REALLY REALLY LOVE this look i created. but the sentiments seem to be divided amongst my girl and guy friends. girls find it really cute and dolly looking, while guys.. they just don't know how to appreciate it.
feel free to play around with the colours on the eyes! the most important thing is to lighten the skin with a foundation so that the lighter shades will show up well on the skin. next time i'll attempt a pastel look.
while this may not be the most useful makeup tutorial i've created since this is hardly a daily look for most of us, it's fun to play around with makeup once in a while right? and also to prepare us for the day we set foot in japan so that we can look like one of them :'D

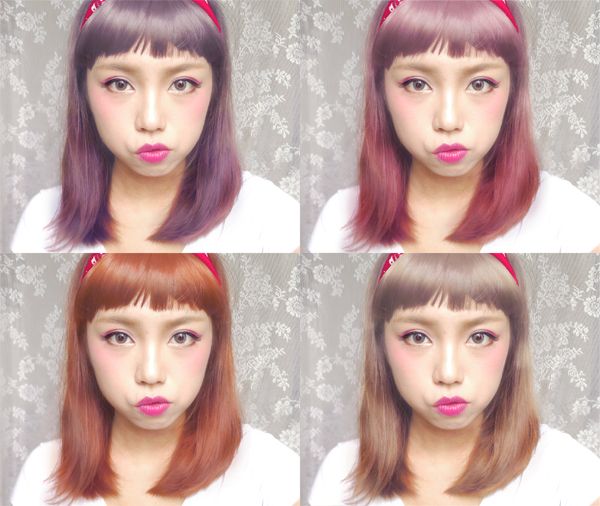
i played around with photoshop to "dye" my hair HAHAHHA which looks the best!?
hope you like the look and find this sharing useful!
xoxo
karman


No comments:
Post a Comment